
Cross post from the original here,
http://bead-tutorial.livejournal.com/35182.html
Tutorial : Reyna
Level : Beginner
Technique : Crossweaving
You can download the pdf here
https://drive.google.com/file/d/1ckMyw1-uhMifA6pocTaKKK-24rP6yaG9/view?usp=sharing
Equipment :
- Swarovski crystal bicone 4mm. (denim blue, antique pink and satin.)
- Pearl round 4mm. (light blue, rosaline, and light grey)
- Seed bead 11/0 (galvanized silver)
- Fishing nylon thread No. 25
- Clasp and jumprings
This
is easy bracelet. But if you find it difficult to pass through the seed
beads. You may change to bigger seed beads or just use smaller thread.
1.
If
you want to finish the bracelet in one go, cut the thread about your
wingspan (your open arms). But if you don't like to work with long
thread, just use comfortable length.
Make a ring of six seed
beads. You will add jumpring and clasp to this ring. Feel free to adjust
the number of seed beads to your liking.
2
Add
one pearl, one seed bead, one crystal, one seed bead and one pearl to
each thread. Cross both threads at a seed bead (red arrow).
3.

Add one seed bead to each thread. Cross both threads at a seed bead (red arrow).
4.
Repeat step 2 and 3 but use the other set of colors.
Make
around 8 - 10 sets depend of your desired length of bracelet. End the
other side with the ring of six seed beads (or the same number you used
in step 1.)
5.
We will make the top layer. Cross both threads at a seed bead (red arrow). Pass each thread to the next pearl (blue arrows).
6.
Add one seed bead and one crystal to each thread. Cross both threads at seed bead (red arrow).
7.
Add one crystal and one seed bead to each thread. Pass your thread to the next pearl (red arrows).
Cross
your threads at the seed bead. Pass your thread to the next seed bead
and cross them at the seed bead. Pass your thread to the pearl (blue
arrows).
8.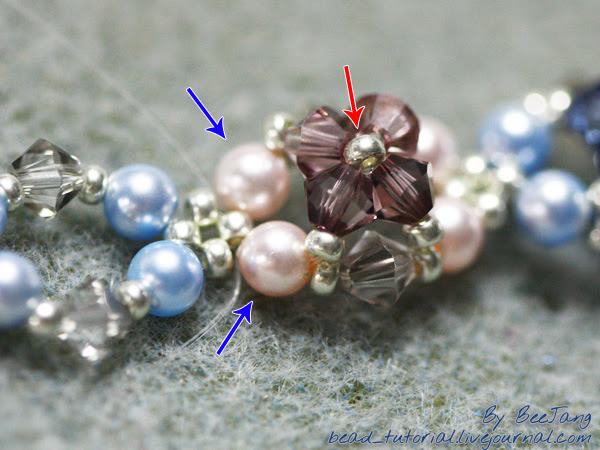
This
is the same as step 6 and 7. Add one seed bead and one crystal to each
thread. Cross both threads at a seed bead (red arrow). Add one crystal
and one seed bead to each thread. Pass the threads to the pearl (blue
arrows).
9.
Repeat adding the top layer to the rest of the bracelet. Cross both threads at a seed bead (red arrow).
10.
We
will add more beads to the side of the bracelet. But if you are happy
with the bracelet now, you can add your jumprings and clasp right away.
Pass the thread to the pearl, seed bead, crystal and exit at a seed bead (red arrow). Do the same to the other thread too.
11.
Add
two seed beads, one pearl and two seed beads. Pass your thread to the
seed bead at the next set (red arrow). Pass the thread to the next
crystal and seed bead (blue arrow). Do the same to the other thread too.
Continue adding seed beads and pearl to the rest of the bracelet.
12.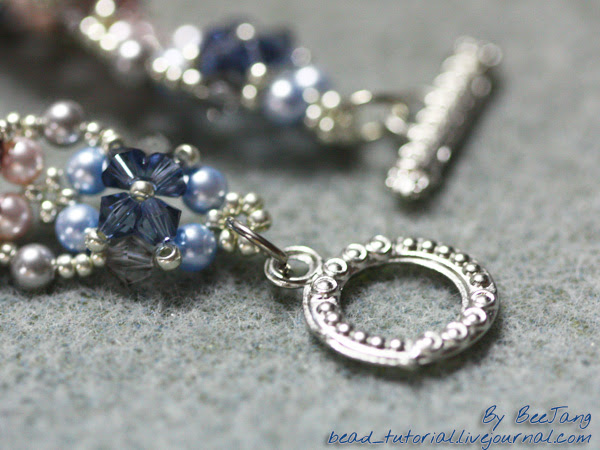
Finally, add jumpings and your clasp.

Well,
this above bracelet is my first try with this design. I miss calculate
the length of the bracelet and it came out quite short so I just used
extension chain and lobster clasp and added crystal heart shape at one
end. The pearls here are swarovski Petrol pearl. It
match up so well with those AB2X crystals.
Hope you enjoy this tutorial. Happy beading.
Please don't ever take these down! I've been a fan for years.. you can't find tutorials like this anymore
ReplyDelete